
Most of us get lots of “push” notifications on our devices. Push notifications can arrive at any time, often unrelated to what you’re currently doing on your device. On our smartphone or tablet these can be useful, or they can be annoying. On a PC or Mac they can also be malicious. A nefarious notification might include:
- Fake Security Alerts
- Example: “Your PC is infected! Click here to remove the virus.”
- These often mimic legitimate antivirus alerts to trick users into downloading malware.
- Phishing Attempts
- Example: “Your account has been compromised! Verify your details now.”
- Clicking the link leads to a fake login page designed to steal your credentials.
- Scam Giveaways or Fake Offers
- Example: “Congratulations! You’ve won an iPhone. Click to claim.”
- Clicking the notification leads to a site asking for personal details or payment information.
- Software Updates or Downloads
- Example: “Critical Chrome update required! Install now.”
- These push fake software updates that install malware instead.
The notifications that most of us are used to are usually from an app. But it is also possible for websites to send push notifications. This tip will focus on the latter, i.e. web push notifications.
Web push notifications on a PC or Mac are riskier than app push notifications on an iPhone or Android device because they do not go through Apple’s or Google’s review process. Mobile app notifications must be sent via Apple’s Push Notification Service (APNs) or Google’s Firebase Cloud Messaging (FCM), which adds a layer of security and oversight. In contrast, web push notifications come directly from websites, allowing malicious actors to exploit them for scams, phishing, and deceptive alerts without needing approval from a trusted platform.
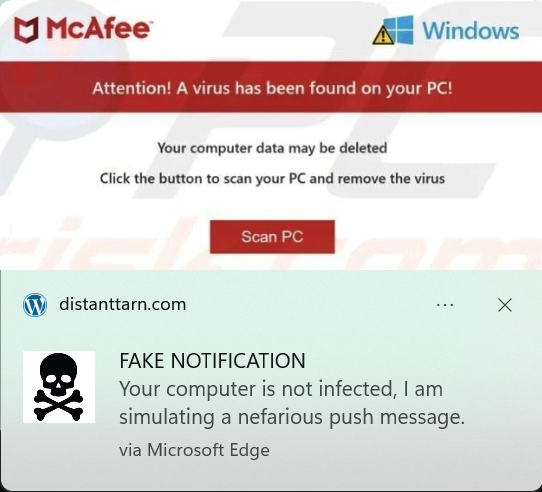
On a PC, notifications appear in the lower right corner of the display, whether they are from Windows itself, from a Windows app, or from a browser such as Edge or Chrome. Here is an example of a notification from Microsoft Edge:
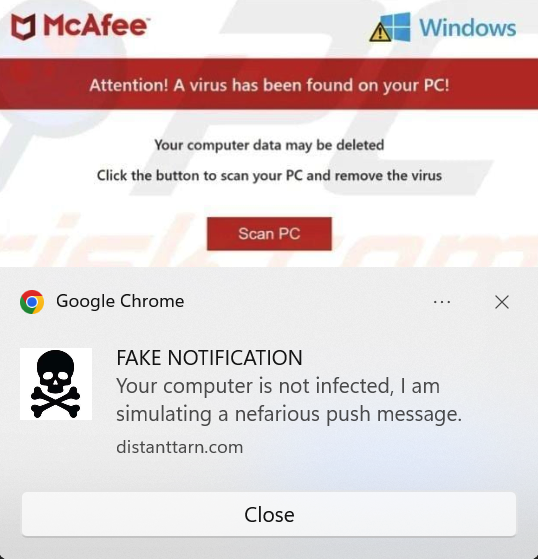
Below is an example of the same push notification that went through Google Chrome. These are notifications that I created for the purpose of this Tip.
The components of a notification include:
- An image (optional). Because it is an image, it is easy for a scammer to include pretty much anything, including logos to make you think that the notification came from a legit source (in this case McAfee). In the above examples, the top half of the notification is all just one PNG image that I copied from the Internet, including logos and Scan PC button.
- A title. In this case: “FAKE NOTIFICATION” (my wording – a scammer would instead use deceptive language)
- Some text. In this case “Your computer is…”
- The Windows app that is posting the notification, “via Microsoft Edge” or “Google Chrome”.
- The logo of the sender. In this case I used a Skull and Crossbones logo, but a scammer would more likely use a logo that lulls you into thinking the notification is safe.
- The website that is the source of the notification, in this case distanttarn.com (my test website). The sender cannot hide this item, so this is something you can use to determine that the notification didn’t really come from, say, McAfee. So this is KEY.
- A hidden link to a website, that may or may not be different from the website listed as item 6. If you click on the notification, your default browser opens on that website.
It is important to note that the notification itself is not harmful if you ignore it. The harm comes if you click on it and then get tricked into e.g. entering credit card information or a password.
On a Mac, notifications appear near the top right of the display. Here is an example of my sample notification as received by Safari:
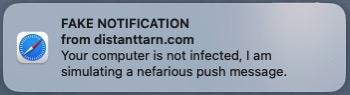
Safari doesn’t display the image (item 1 above) or the logo (item 5), so it can appear less threatening, but is just as dangerous if you click on it.
Here is again the same notification, this time as received on a Mac using Chrome:
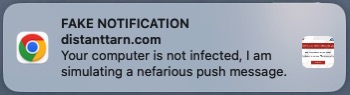
With Chrome, the image portion (item 1 above) is also included, but in this case it is too small to be threatening.
Blocking Web Push Notifications
If you receive a notification that your suspect is nefarious, you can simply close it, although if you want to avoid clicking anywhere within the notification you can instead quit the browser (Chrome/Edge/Safari) that is displaying the notification. For example you can right-click on the corresponding browser icon in the Task Bar (PC) or Dock (Mac) at the bottom of your display and then select Quit from the context menu that appears.
If you receive a malicious notification, then you will probably want to block future notifications from that source. On Chrome use the menu to navigate to Settings > Privacy and security > Site settings > Notifications or on Edge go to Settings > Cookies and site permissions > All permissions > Notifications. On that page you can see a list of websites that are not allowed and allowed to send you notifications. If you see the website listed matching what is displayed in the notification (item 6 above), select Block from the menu at right. To block notifications in Safari, from the menu bar at the top of the display select Safari > Settings > Websites > Notifications.
You may instead want to block notifications from any website, which you can do from that same Settings page.
When to Grant Permission
Why did you receive a nefarious notification? By default, apps and websites cannot send you push notifications – you must grant them permission to do so. If you never grant permission, you will never see fraudulent web push notifications!
A website may ask for such permission when you visit that website. E.g., on Safari it would look like this:
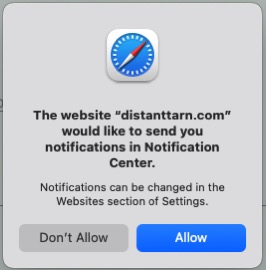
If you get such a request from a website you are viewing on your PC or Mac, be particularly careful about granting permission to send notifications. You may be ok with TheWeatherNetwork sending you notifications, or Amazon (“you left items in your cart – checkout now?”), but you shouldn’t automatically grant permission, especially to a site you know little about. If you deny permission to send notifications, that doesn’t mean you cannot use the site, it just means that they cannot send you unsolicited notifications.
In today’s digital world, websites and apps frequently request access to your notifications, microphone, camera, location, and other sensitive data. While some requests are necessary for functionality, granting permissions without scrutiny can compromise your privacy and security. Always ask yourself: Does this website or app truly need this access? If unsure, deny the request or review the app’s settings to manage permissions carefully. In the case of notifications this is particularly important, because the notification can come later, when you are no longer on the site, making it easier to trick you into believing the notification came from e.g. McAfee.